
If you’re curious to try macOS Golden Gate while it’s still in beta, I highly recommend installing it on a separate APFS volume instead of your main volume. Installing macOS 27 on your main volume would replace macOS Tahoe, leaving you at the mercy of any bugs or compatibility issues that arise with the software and hardware you use.
Unlike iOS and iPadOS betas, macOS betas can pose a greater risk due to the complexity of macOS, which includes support for legacy software and hardware. I’ve been burned too many times in the past with hardware and software that didn’t work properly for months until the inevitable updates came after the public version was released later that fall. In my opinion, it’s just not worth it.
The good news is, thanks to APFS, you can easily create a separate volume and silo the macOS Golden Gate beta installation away from your production Tahoe volume. This allows you to test the macOS beta in full while retaining the stability and reliability of the current public release. Watch our full hands-on video walkthrough for a complete step-by-step guide, and be sure to subscribe to 9to5Mac on YouTube for more macOS tutorials.
Note: To follow this guide, your Mac must already be using an APFS-formatted startup disk.
Download macOS Golden Gate installer via Terminal
Note: If you want to download the macOS Golden Gate beta, you’ll need to go to Settings → General → Software Updates, and select macOS 27 Golden Gate Beta in the Beta Updates section.
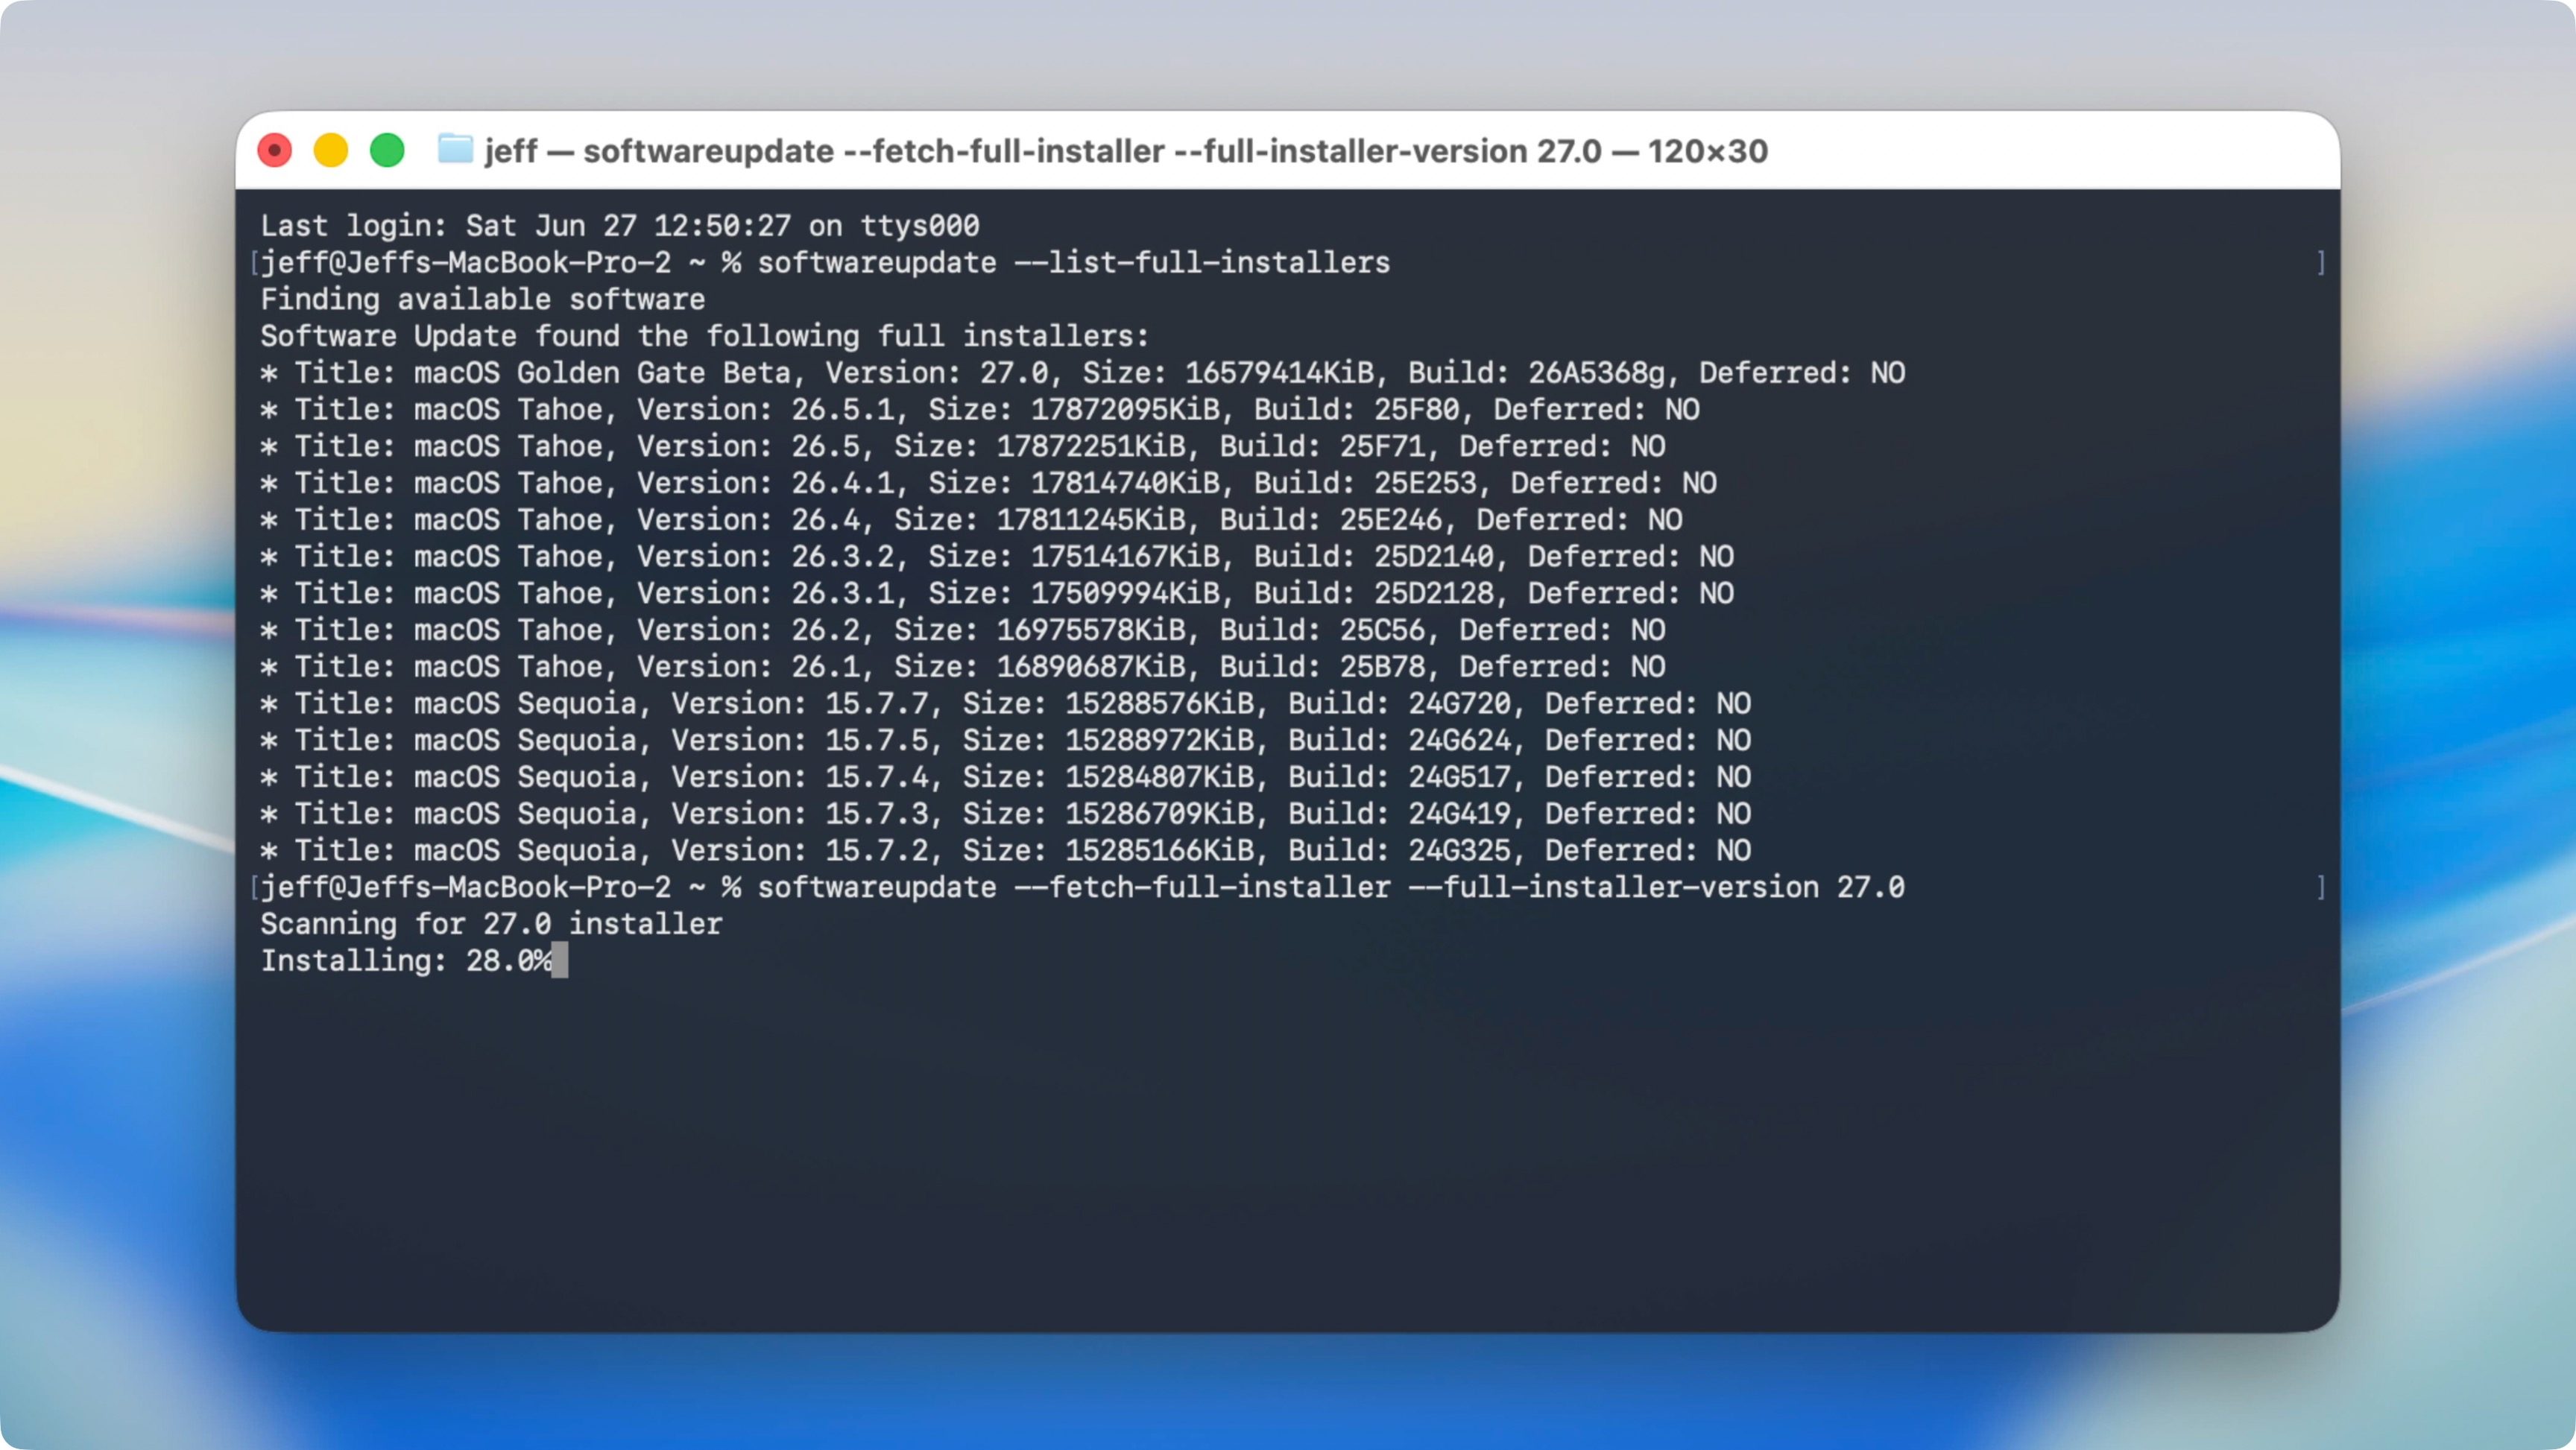
Step 1: Open Terminal via Finder → Applications → Utilities, and copy and paste the following command:softwareupdate --list-full-installers
Step 2: Once it returns the list of available installers, enter the following command to download macOS Golden Gate:softwareupdate --fetch-full-installer --full-installer-version 27.0
You can replace the version, in the above case, 27.0, with whatever version of macOS listed that you wish to download.
Video: How to install macOS Golden Gate on a separate APFS volume
Subscribe to 9to5Mac on YouTube for more macOS tutorials
Create a new APFS volume
Step 3: Open Disk Utility via Finder → Applications → Utilities.
Step 4: On the left sidebar, below Internal, select Macintosh HD.
Step 5: On the top toolbar, click the + sign above Volume and the Add APFS volume to container? modal should appear.
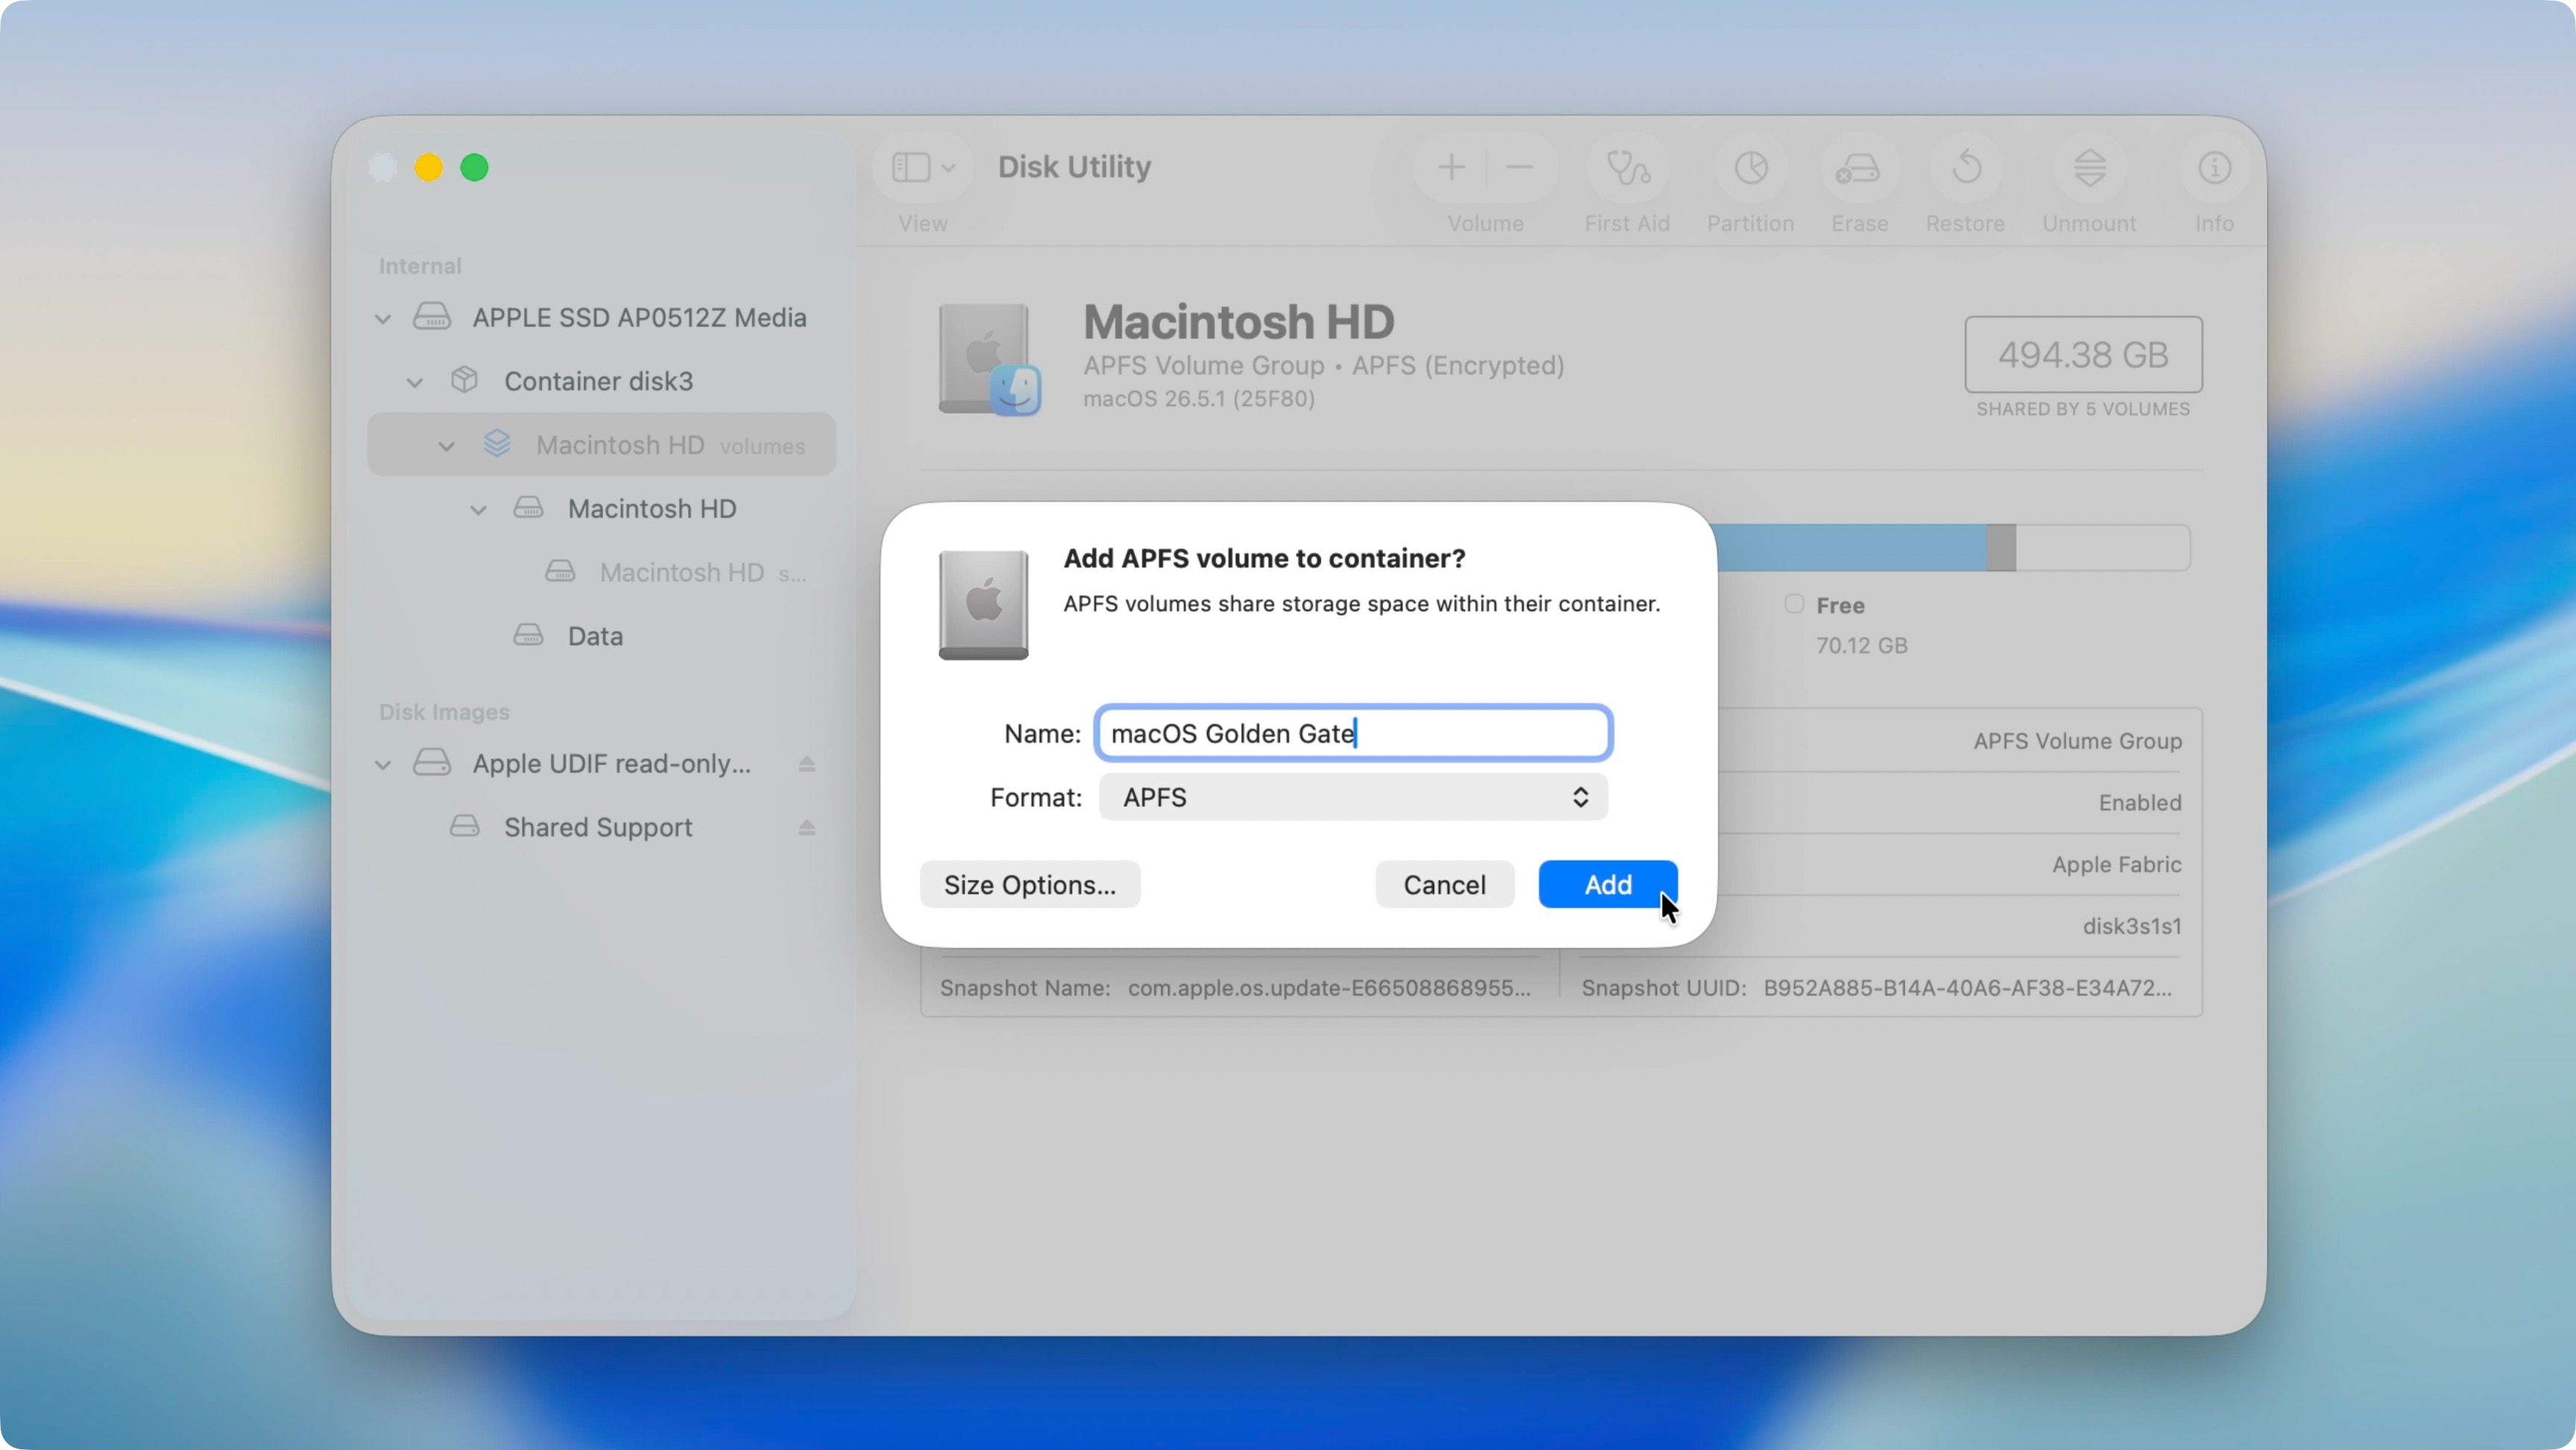
Step 6: Give the volume a name, like macOS Golden Gate, select APFS for Format, then click Add to confirm. Once Disk Utility finishes the creation of the new APFS volume, click Done.
Note: Do not choose APFS (Encrypted), otherwise you will get an error that says “You may not install to this volume because it has a disk password” when attempting to select the volume using the macOS Installer. Instead, you can enable FileVault encryption after the macOS installation is completed.
Step 7: You should now see the new volume in the left sidebar. In the example for this tutorial, the volume is named macOS Golden Gate.
Install macOS Golden Gate on the new APFS volume
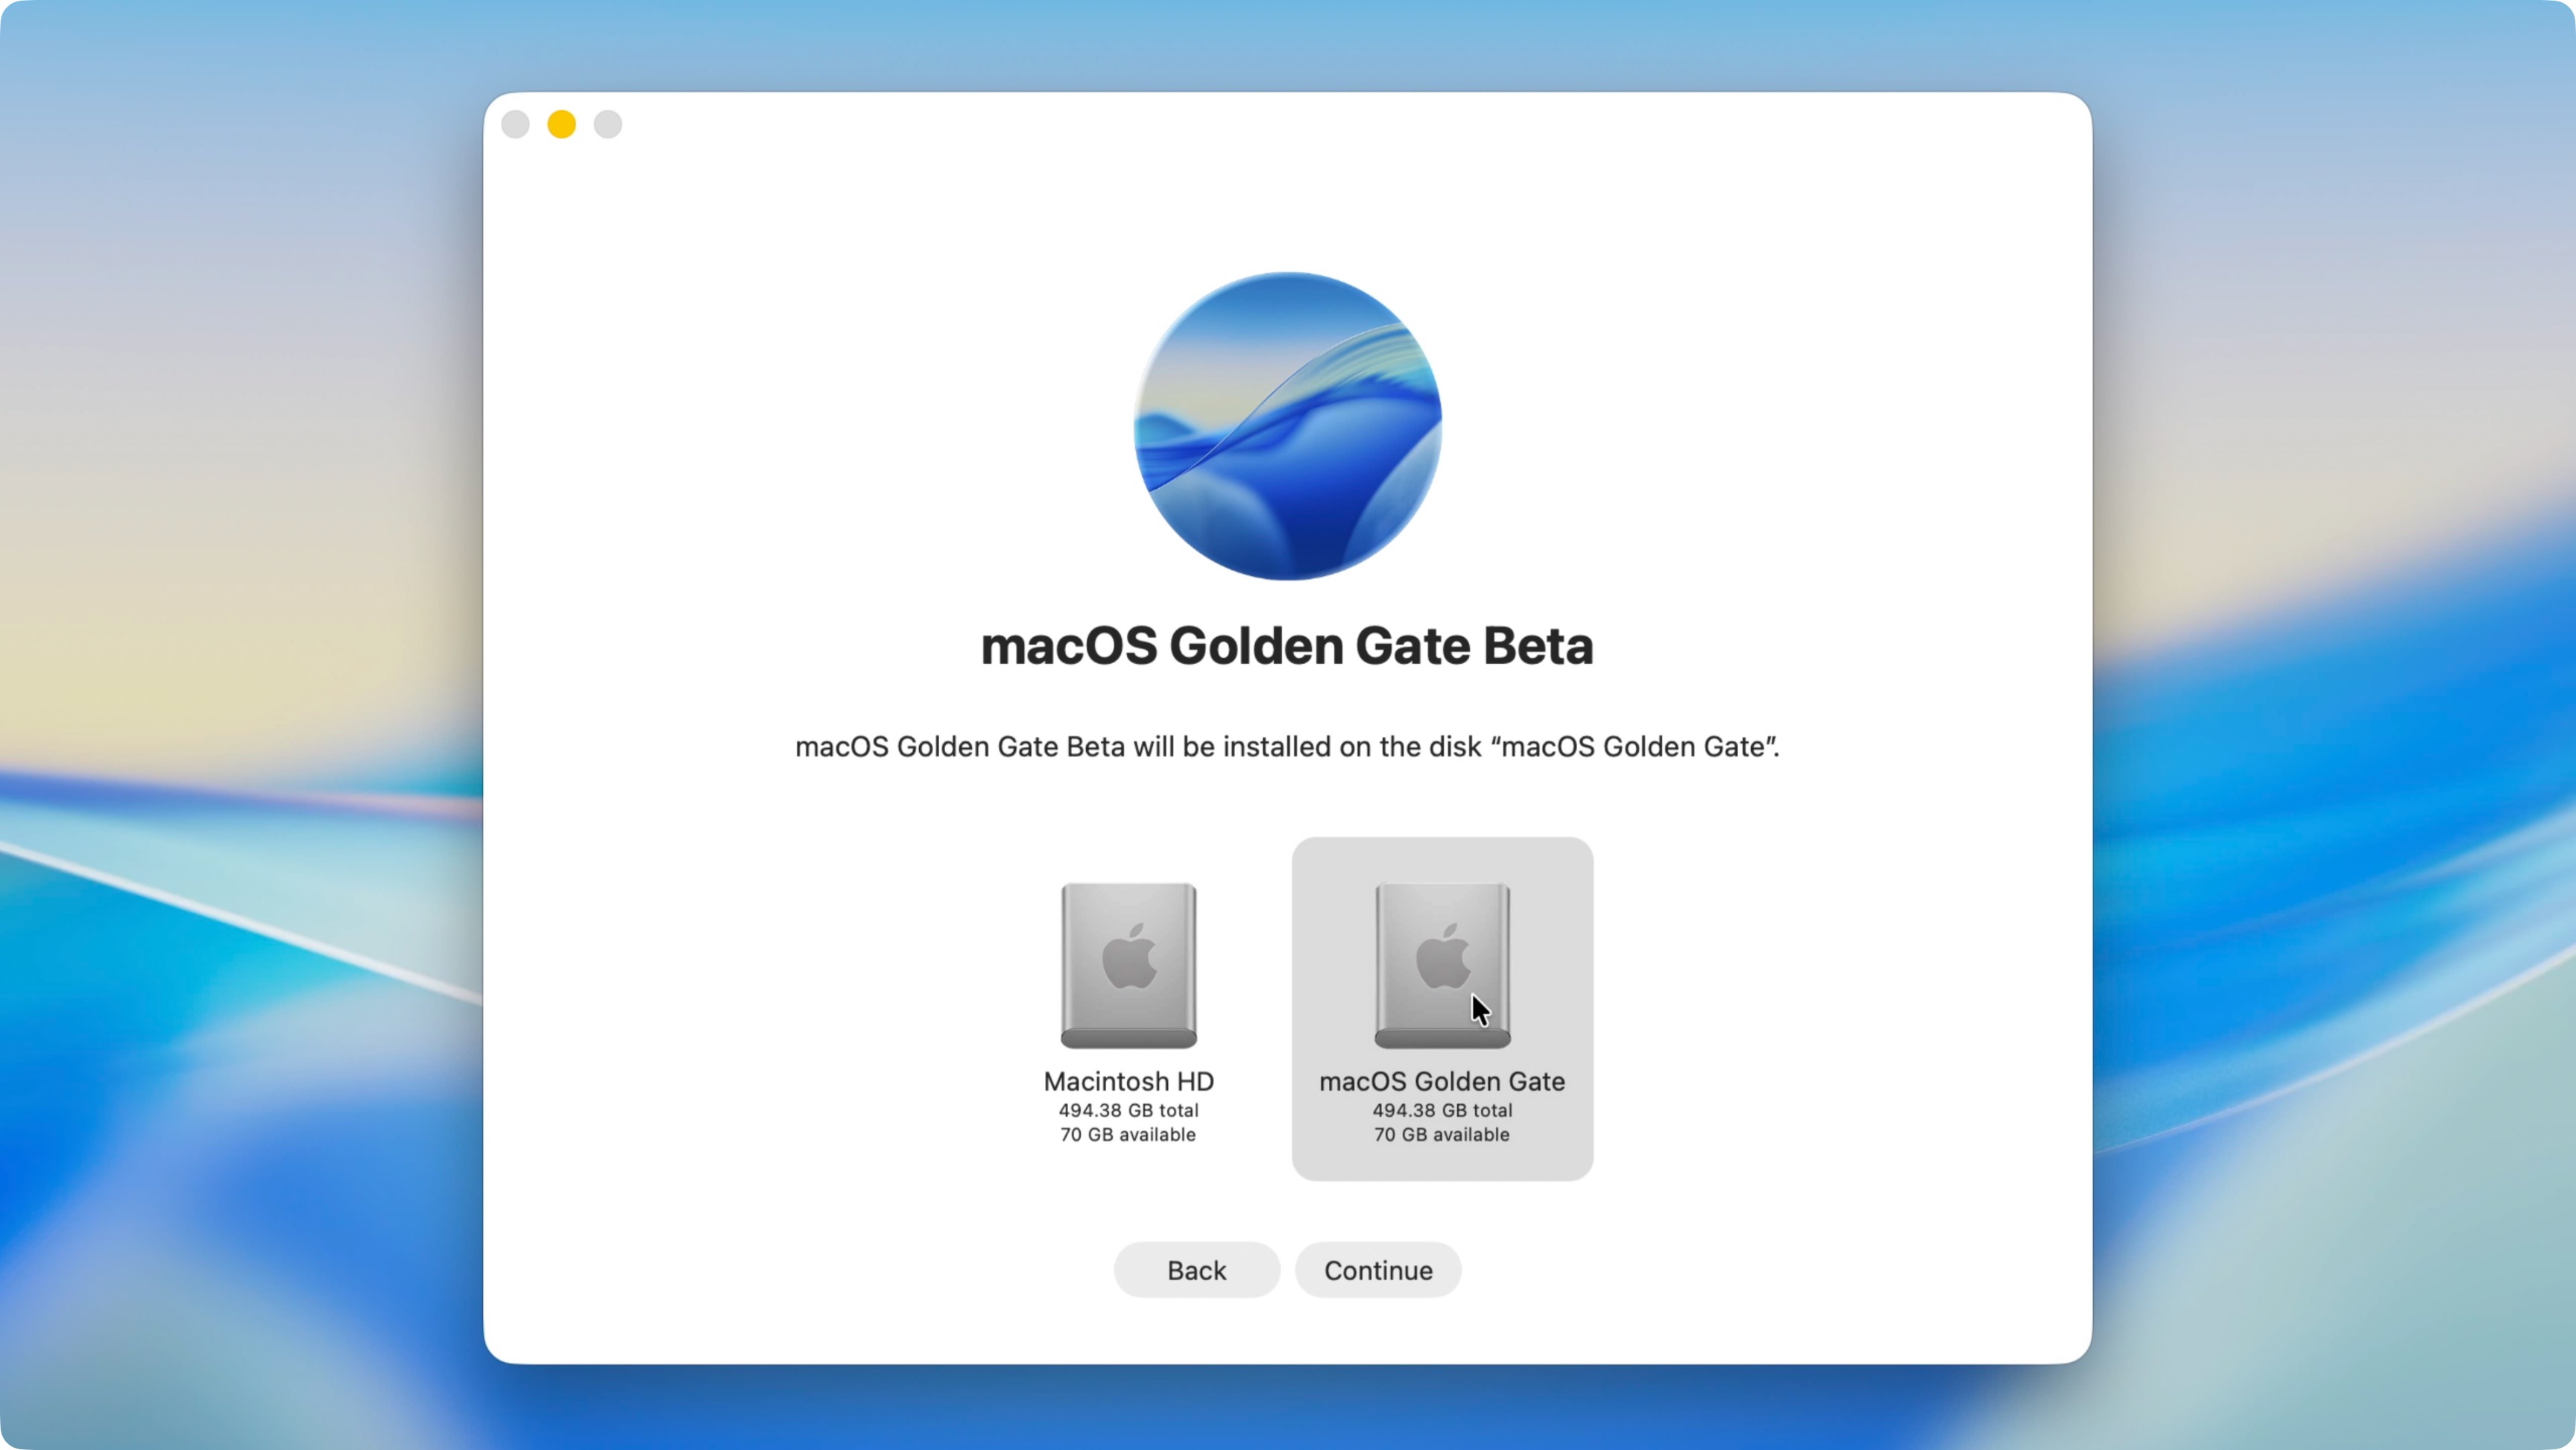
Step 8: Open Install macOS Golden Gate via Finder → Applications, and click Continue, Agree and Agree.
Step 9: Click Show All Disks…, select the macOS Golden Gate volume, and click Continue.
Step 10: On the user selection screen, select the current user for your existing macOS installation, make sure copy account settings is enabled, then click Install.
Step 11: On the Install Golden Gate modal, enter your administrator password to proceed and click Unlock.
Step 12: The installation will commence, and eventually you’ll be asked to restart your Mac to complete the installation. Click Restart to finish the installation.
How to switch between the two APFS volumes
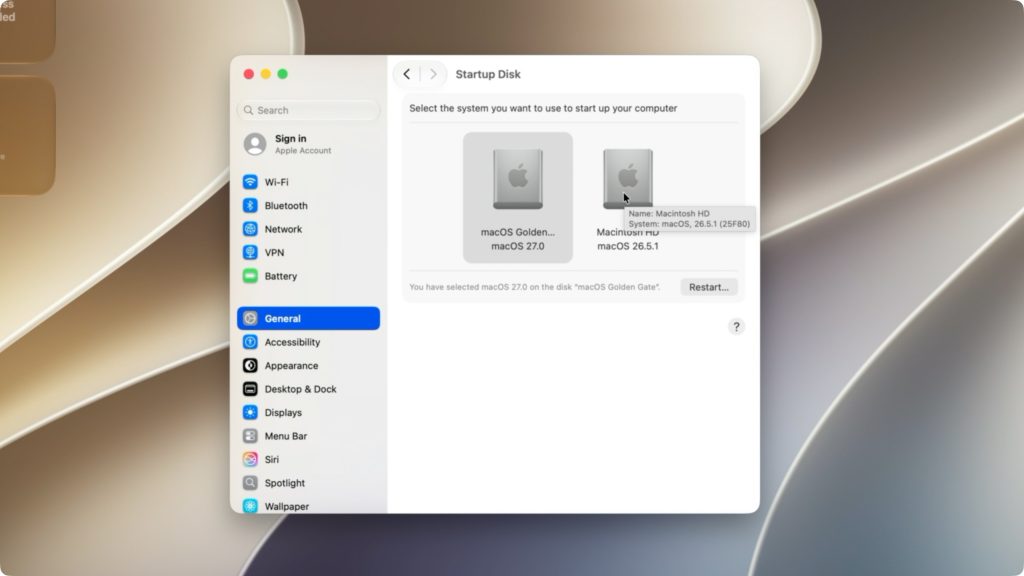
Once the install is complete, it will boot into the new volume. To switch volumes, open Settings → General → Startup Disk, select the other volume, then click Restart to boot into that volume.
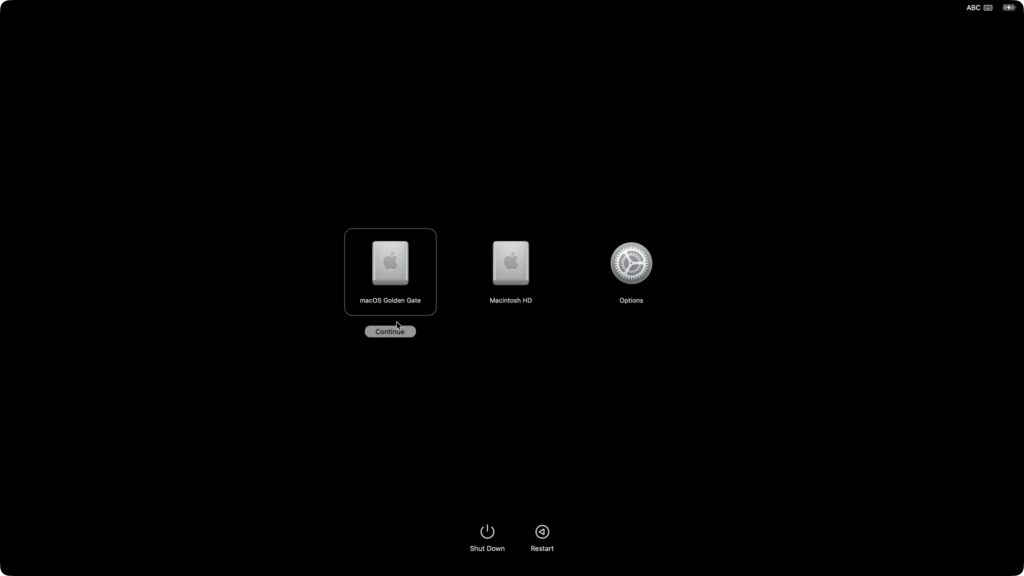
Alternatively, shut down your Mac, and press and hold the power button until the startup options appear. There you will be allowed to select the other boot volume.

9to5Mac’s Take
APFS makes it ridiculously easy to spin up new APFS volumes. These volumes make it super simple to test new versions of macOS, like macOS Golden Gate, without committing them to your main installation. Therefore, you can run macOS Tahoe on your main volume, and macOS Golden Gate on a separate test volume, and boot between them.
Especially for new beta releases, such a strategy is handy because it keeps the test OS siloed from your main production OS. iOS betas are generally stable, mundane affairs, but installing a macOS beta on your main volume is much riskier. Thanks to APFS volumes, you can easily use both and switch between them as desired.
Are you running the macOS Golden Gate beta on a separate APFS volume? Let us know your experience in the comments.
FTC: We use income earning auto affiliate links. More.
